
A Definitive Guide to Cleaning and Maintaining Your AR-15 Rifle (2025 Edition)
Posted by Mandu Moses on Dec 19th 2025
Modern AR-15s face significant stressors, including the use of hyper-velocity ammo and suppressors, which can accelerate fouling. Let's break down the science of fouling:
- Carbon’s Evolution: New “low-smoke” propellants (e.g., Hodgdon CFE BLK-2) leave micro-abrasive particles that accelerate gas system wear.
- Copper’s Stealth Threat: Monolithic copper rounds (Barnes TSX 2025) deposit fouling faster than traditional lead-core ammo.
- Environmental Enemies: Polymer-eating microbes in humid climates degrade lubricants; desert silica dust embeds in bolt carriers.
Case Study: A 2018 Army investigation into unintentional firings of the M4A1 carbine revealed that approximately 6% of inspected service rifles exhibited a defect due to a tolerance stack of the internal firing components. This issue, affecting at least 881 carbines, highlights the importance of precise manufacturing and quality control in military-grade firearms. This should include adequate gas ring cleaning.
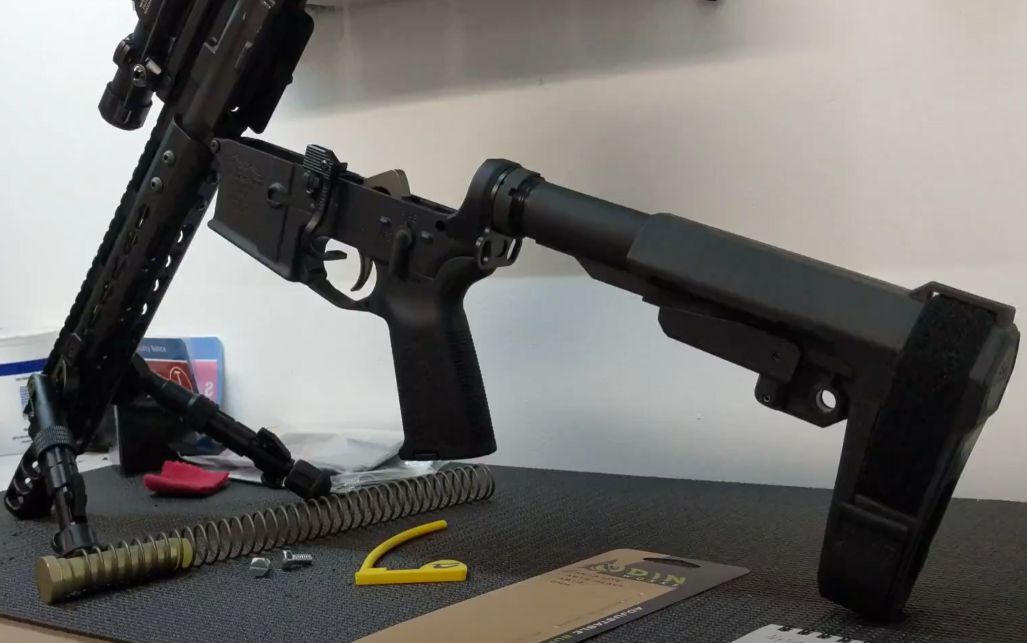
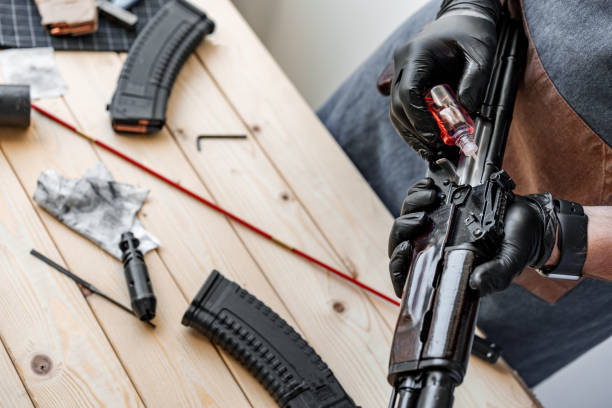
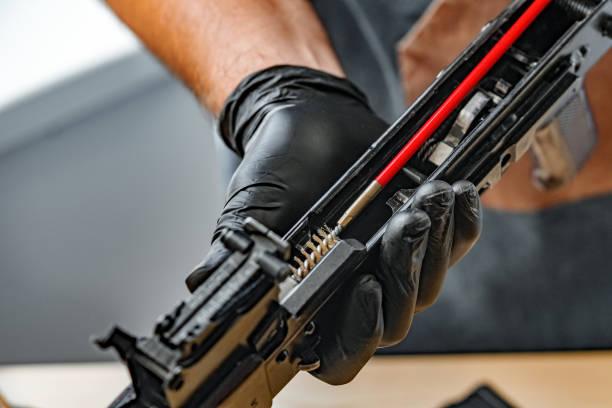
Credit Johnny Montes
Why Cleaning Matters
Think of your AR-15 as a high-performance engine. Combustion leaves residue. In an AR-15, that residue is carbon fouling, unburnt powder, and metallic particles. These contaminants accumulate in critical areas like the bolt carrier group (BCG), chamber, and gas system.
The AR-15's direct impingement gas system, while efficient, introduces combustion byproducts directly into the action, making regular cleaning even more crucial than in some other firearm designs.
Reliability:
Fouling causes malfunctions in a domino effect. A dirty BCG can lead to failures to feed, extract, or eject. Carbon buildup restricts the bolt's movement, impacting its ability to lock and unlock correctly.
A clogged gas system restricts proper cycling, causing short stroking (where the bolt doesn't travel far enough back to pick up a new round) or even complete failure to cycle. The extractor, a small but critical component, can become gummed up with carbon, leading to failures to extract spent casings.
Accuracy:
Carbon buildup in the barrel degrades accuracy gradually. It disrupts the bullet's flight path, leading to inconsistent shots. This is particularly noticeable with match-grade ammunition, where even minor imperfections can significantly impact accuracy. Fouling can also create pressure variations within the barrel, further affecting bullet stability. The crown of the barrel, the muzzle's edge, is especially sensitive; damage or fouling here can drastically reduce accuracy.
Longevity:
Corrosion is a silent killer. Residue attracts moisture, leading to rust and pitting, ultimately shortening the lifespan of your rifle. This is especially true in humid environments or if you're shooting corrosive ammunition (though less common now, it's still a concern with some surplus ammo).
Pitting in the bore can permanently damage the barrel, affecting accuracy and potentially leading to unsafe conditions. Rust on the BCG can cause friction and wear, accelerating the degradation of critical components.
Essential AR-15 Maintenance Tools and Supplies
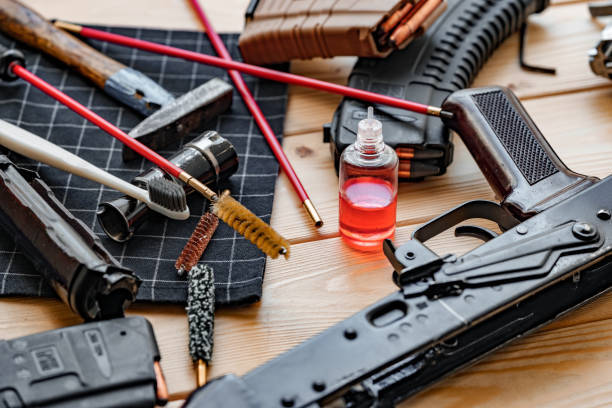
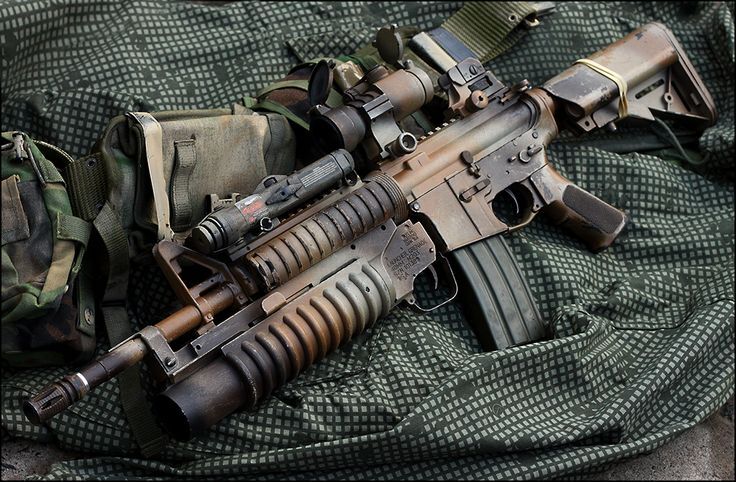
Credit: FabrikaCr
Don't skimp on quality. Invest in tools that will last and perform reliably. Here's a curated list with explanations and recommendations:
Cleaning Rod:
A coated, one-piece rod is ideal. Avoid multi-piece rods as they can damage the bore. Look for a rod with a rotating handle for smooth cleaning.
Recommendation: Dewey Cleaning Rods are a popular choice for their quality and durability. Consider the length of your barrel when choosing a rod length.
Bore Brush:
Choose a bronze or nylon brush specifically sized for your caliber. Bronze is more aggressive for heavy fouling, while nylon is gentler for regular cleaning.
Recommendation: Bore Tech brushes are known for their durability and effectiveness.
Chamber Brush:
A dedicated chamber brush ensures thorough cleaning of the chamber area.
Recommendation: A 5.56mm chamber brush with nylon bristles is a good all-around choice.
Patches:
Purchase high-quality cotton patches in various sizes. Pre-cut patches save time and effort. Recommendation: Invest in a bulk pack of high-quality cotton patches. They're inexpensive and essential.
Credit: camptoloma
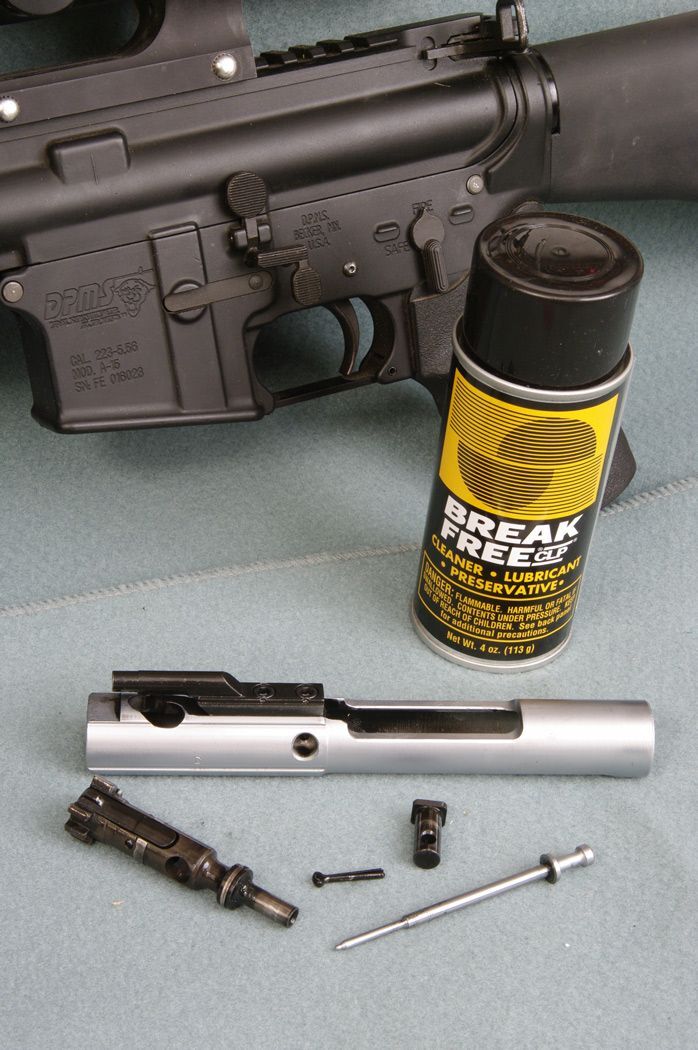
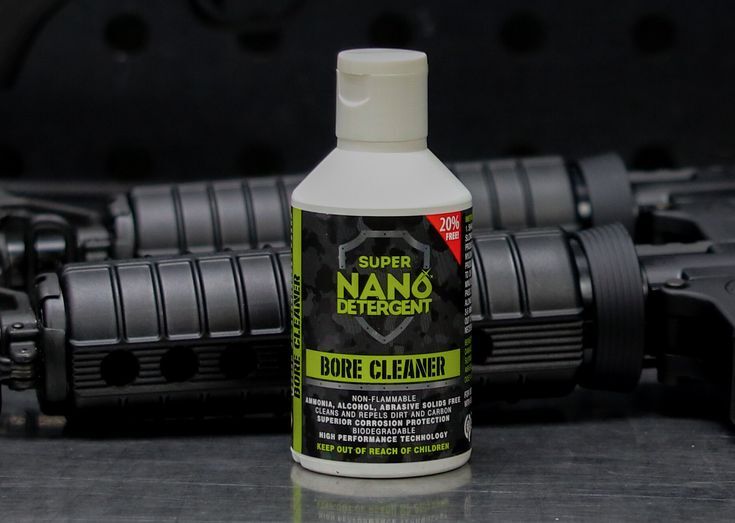
Solvent:
A quality solvent dissolves carbon fouling and powder residue. Choose a solvent specifically designed for firearms.
Recommendation: Hoppe's No. 9 is a classic choice, but there are many modern solvents available. Consider a solvent specifically designed for carbon removal, like Carbon Killer.
Lubricant:
Lubrication is crucial for smooth operation and preventing wear. Select a lubricant appropriate for your climate and shooting conditions.
Recommendation: See the AR-15 Lubrication Guide section below for detailed recommendations.
Cleaning Picks:
These are invaluable for reaching tight corners and removing stubborn carbon deposits.
Recommendation: A set of dental picks works well, but specialized gun-cleaning picks are more durable.
Gun Cleaning Mat:
Protect your workspace and prevent scratches with a dedicated gun cleaning mat.
Recommendation: A mat with a non-slip surface and solvent-resistant material is ideal.

Credit: Ge Anne
Upper Receiver Vise Block:
This tool securely holds the upper receiver for easier cleaning and maintenance.
Recommendation: A Magpul BEV Block is a popular and versatile option.
Bolt Carrier Group (BCG) Scraper:
Specialized scrapers make quick work of carbon buildup on the BCG.
Recommendation: A dedicated BCG scraper set, like the Real Avid AR15 Master Cleaning Station, can save you a lot of time and effort.
Gas Tube Cleaning Brush:
A dedicated brush for cleaning the gas tube is essential for maintaining gas system performance. Recommendation: A pipe cleaner can also be used in a pinch, but a dedicated gas tube brush is more effective.
Eye Protection:
Safety first! Always wear eye protection when cleaning firearms.
Recommendation: Any ANSI-rated safety glasses will work.
Gloves:
Protect your hands from solvents and contaminants.
Recommendation: Nitrile gloves are a good choice as they are resistant to most solvents.
Credit: FabrikaCr
Small Hammer and Punches:
Useful for removing and installing pins.
Recommendation: A set of roll pin punches is essential for working on the AR-15.
Torque Wrench:
For critical components like the gas key, using a torque wrench ensures proper tightening.
Recommendation: A small inch-pound torque wrench is ideal.
Step-by-Step AR-15 Cleaning Instructions
This isn't a superficial wipe-down. This is a comprehensive cleaning process designed to maximize the performance and longevity of your AR-15. We'll also cover common issues you might encounter and how to address them.
1. Safety First: Unloading and Preparation
- Point the rifle in a safe direction. Always assume the firearm is loaded, even after you've checked it.
- Remove the magazine. Visually inspect the magazine well to ensure it's empty.
- Lock the bolt to the rear. Use the bolt catch to lock the bolt open.
- Visually and physically inspect the chamber to ensure it is empty. Use your finger to feel for any obstructions in the chamber.
- Set the safety selector to "Safe."
- Consider using a chamber flag: This provides a visual indication that the chamber is empty.
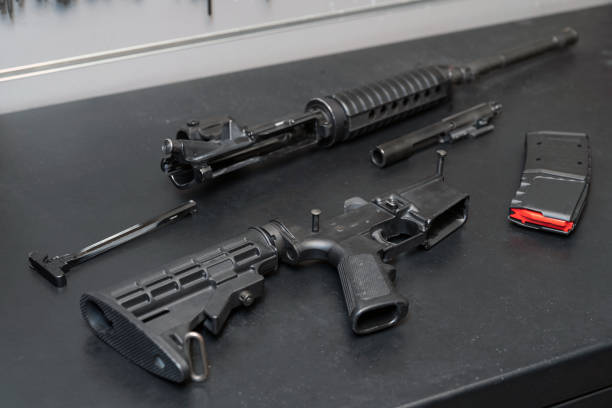
2. Disassembly: Breaking Down the Rifle - Understanding the Components
Credit: wingedwolf
- Make sure the bolt is forward and locked
- Separate the Upper and Lower Receivers: Push out the rear takedown pin, then the front pivot pin. The upper receiver will now pivot open. If the pins are difficult to push out, use a punch and a small hammer.
- Remove the Bolt Carrier Group (BCG): Pull the charging handle to the rear and remove the BCG from the upper receiver.
- Disassemble the BCG: This is the most critical part of the cleaning process.
- Remove the Firing Pin Retaining Pin: Use a small punch or the tip of a cartridge to push out the firing pin retaining pin. These pins can sometimes be difficult to remove if they're bent or damaged.
- Remove the Firing Pin: Tilt the bolt carrier downward, and the firing pin will slide out.
- Remove the Bolt: Push in the bolt and rotate it to align the cam pin with its slot. Remove the cam pin. The bolt will now slide out of the carrier.
- Remove the Extractor: Use a punch or small tool to push out the extractor pin. The extractor and extractor spring will now be free. Be careful, as the extractor spring can launch the extractor pin.
- Remove the Charging Handle: Pull the charging handle back slightly and lift it up and out of the upper receiver.
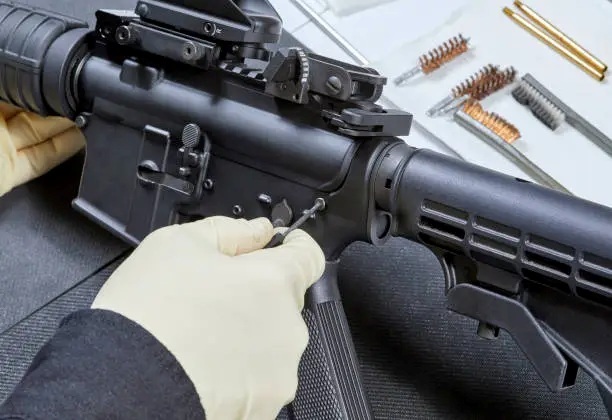
3. Cleaning the Upper Receiver - Focusing on Accuracy and Reliability
Credit: Dmitri Toms
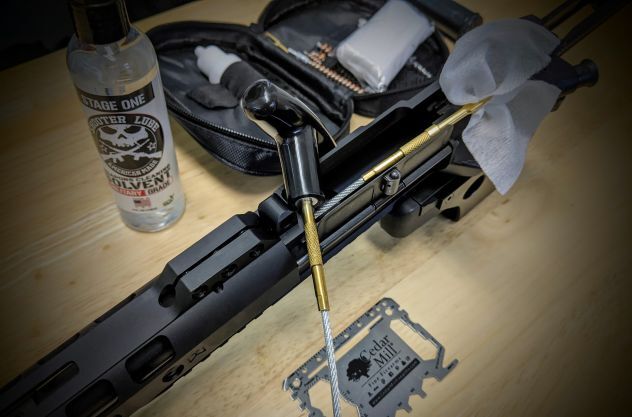
- Bore Cleaning: The bore is the heart of accuracy.
- Attach the bore brush to the cleaning rod.
- Apply solvent to the bore brush.
- Insert the bore brush into the chamber end of the barrel and push it through to the muzzle. Always push the brush through the barrel; never reverse direction while the brush is inside.
- Repeat this process several times, ensuring the brush passes completely through the barrel each time.
- Remove the bore brush and attach a patch loop to the cleaning rod.
- Insert a clean patch into the patch loop and push it through the barrel.
- Repeat with clean patches until the patches come out clean. This may take several patches.
- Troubleshooting: If you're having trouble removing copper fouling, use a copper solvent specifically designed for that purpose.
- Chamber Cleaning: A clean chamber ensures proper feeding and extraction.
- Use a chamber brush and solvent to thoroughly clean the chamber area.
- Wipe the chamber clean with a patch.
- Gas Tube Cleaning: A clean gas tube ensures proper gas flow.
- Insert a gas tube cleaning brush into the gas tube and push it through to remove carbon buildup.
- Wipe the gas tube clean with a patch.
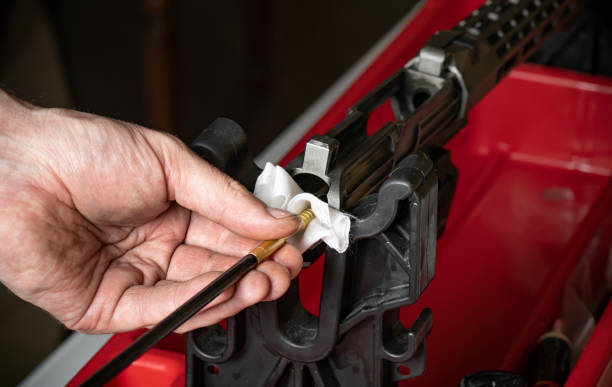
- Wipe Down: Wipe down the entire upper receiver with a clean cloth to remove any remaining solvent or debris.
4. Cleaning the Bolt Carrier Group (BCG) - The Most Important Step
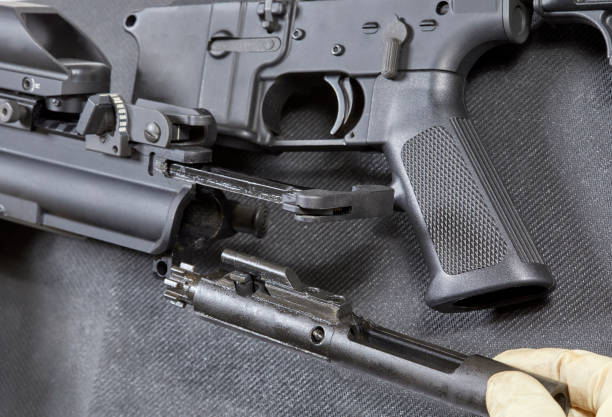
Credit: wingedwolf
This is where the real grime resides. Focus your attention here. A properly cleaned and lubricated BCG is essential for reliable operation.
Bolt:
- Use a carbon scraper or cleaning pick to remove carbon buildup from the bolt face, locking lugs, and gas rings. This is often the most time-consuming part of the process.
- Clean the extractor and extractor spring with solvent and a brush. Pay close attention to the area around the extractor claw.
- Wipe the bolt clean with a cloth.
- Troubleshooting: If the gas rings are worn or damaged, replace them.
Bolt Carrier:
- Use a carbon scraper or cleaning pick to remove carbon buildup from the inside of the bolt carrier, especially around the gas key.
- Clean the firing pin channel with a brush and solvent.
- Wipe the bolt carrier clean with a cloth.
Firing Pin:
- Wipe the firing pin clean with a cloth. Inspect for any damage or wear, especially at the tip.
- Gas Key: The gas key is critical for proper gas flow.
- Ensure the gas key screws are tight. If loose, tighten them carefully with the appropriate tool and torque to the manufacturer's specification (typically around 35-40 inch-pounds). Use a thread locker like Loctite.
5. Cleaning the Lower Receiver - Maintaining Trigger Functionality
Credit: FabrikaCr
- Brush and Wipe: Use a brush and solvent to clean the trigger assembly, hammer, and other internal components. Be careful not to over-lubricate these components, as this can attract dirt and debris.
- Wipe Down: Wipe down the entire lower receiver with a clean cloth.
6. Lubrication: Applying Lubricant Strategically
Proper lubrication is essential for smooth operation and preventing wear. Apply lubricant to the right areas, and don't overdo it.
Bolt Carrier Group (BCG): Apply lubricant liberally to the following areas:
- The exterior of the bolt.
- The inside of the bolt carrier.
- The cam pin.
- The firing pin.
- The gas rings.
- Charging Handle: Apply a small amount of lubricant to the charging handle where it contacts the upper receiver.
- Trigger Assembly: Apply a small drop of lubricant to the trigger pivot points.
- Other Moving Parts: Apply a small amount of lubricant to any other moving parts in the lower receiver.
- Troubleshooting: If the action feels sluggish, try a different lubricant or adjust the amount of lubricant you're using.
AR-15 Lubrication Guide
The lubricant you choose depends on your shooting environment and frequency. Consider the viscosity of the lubricant, as well as any additives it may contain.
High-Performance Synthetic Lubricants:
These are excellent for all-around use, offering superior protection against wear and corrosion. They perform well in extreme temperatures.
Examples: Lucas Oil Extreme Duty Gun Oil, Slip2000 EWL. Look for lubricants with anti-wear additives and corrosion inhibitors.
Grease:
Grease is ideal for high-friction areas like the bolt locking lugs and the buffer retainer.
Examples: TW25B Grease, Mil-Comm TW25B. Grease provides a longer-lasting layer of lubrication than oil.
Dry Lubricants:
These are useful in dusty or sandy environments as they don't attract dirt and debris. Examples: Hornady One Shot Gun Cleaner and Dry Lube. Dry lubricants typically contain PTFE (Teflon) or molybdenum disulfide.
Avoid: WD-40 as a primary lubricant. While it's a good cleaner, it's not a long-lasting lubricant.
Credit: dennischerenkov
7. Reassembly
Reassemble the BCG:
- Insert the extractor and extractor spring into the bolt.
- Insert the extractor pin.
- Slide the bolt into the bolt carrier.
- Align the cam pin hole and insert the cam pin.
- Rotate the cam pin 90 degrees.
- Insert the firing pin.
- Insert the firing pin retaining pin.
- Insert the Charging Handle: Slide the charging handle into the upper receiver.
- Insert the BCG: Slide the BCG into the upper receiver.
- Reattach the Upper and Lower Receivers: Align the upper and lower receivers and push in the front pivot pin, then the rear takedown pin.
8. Function Check
- Manually cycle the action several times to ensure smooth operation. Listen for any unusual noises or resistance.
- Check the safety selector to ensure it functions properly. The safety should engage and disengage smoothly.
- Perform a trigger reset test to ensure the trigger resets correctly. The trigger should reset with a distinct click.
- Perform a magazine insertion and ejection test. The magazine should insert and eject smoothly.
- Perform a dry-fire test (with proper safety precautions!). The trigger should break cleanly, and the hammer should fall.
How Often Should You Clean Your AR-15?
The frequency of cleaning depends on several factors:
- Shooting Frequency: The more you shoot, the more often you need to clean.
- Ammunition Type: Dirty ammunition produces more fouling.
- Environmental Conditions: Dusty or sandy environments require more frequent cleaning.
- Lubricant Used: Some lubricants last longer than others.
General Guidelines:
- After Every Range Trip: A basic cleaning and lubrication is recommended after every range trip, especially if you've fired more than 100 rounds.
- Every 500-1000 Rounds: A more thorough cleaning is recommended every 500-1000 rounds. This includes a complete disassembly and cleaning of the BCG.
- Before Storage: Always clean and lubricate your AR-15 before storing it for an extended period.
- Extreme Conditions: If you've been shooting in extreme conditions (e.g., rain, mud, sand), clean your AR-15 immediately afterward.
Advanced Maintenance Tips
Gas Block Cleaning: Periodically inspect and clean the gas block to ensure proper gas flow. A clogged gas block can cause short stroking.
- Buffer Spring Maintenance: Inspect the buffer spring for wear and replace it as needed. A worn buffer spring can cause malfunctions.
- Torque Specifications: When reassembling certain components, such as the gas key, adhere to the manufacturer's torque specifications.
- Record Keeping: Maintain a log of your cleaning and maintenance activities. This helps you track the performance of your rifle and identify potential issues.
- Headspace Check: Periodically check the headspace of your rifle to ensure it's within safe limits.
- Barrel Inspection: Regularly inspect the barrel for signs of wear or damage.
- Extractor Spring Replacement: Replace the extractor spring periodically, as it can weaken over time.
Conclusion
Today's AR-15s aren’t just firearms—they’re complex machines exposed to cutting-edge ammunition, extreme environments, and evolving threats to longevity. The science of fouling has shifted, and so must our approach to maintenance.
Ignoring gas rings, tolerating micro-abrasives, or using outdated lubrication strategies can reduce your rifle’s lifespan by thousands of rounds. With data-backed methods and battle-proven techniques, this guide ensures your AR-15 not only survives but thrives under pressure.
Clean smart and lubricate wisely, and your rifle will deliver peak performance every time you pull the trigger.